


Embroidery digitizing is the process of converting a logo or design into a digital file that an embroidery machine can read and stitch onto fabric. One of the most common file formats used in embroidery is the PES file, which is compatible with Brother embroidery machines. If you're looking to digitize logo for embroidery or convert an image into a PES file, this guide will walk you through the process.
Why Digitize a Logo for Embroidery?
Digitizing a logo allows businesses, hobbyists, and designers to create professional-quality embroidered patches, apparel, and promotional items. Whether you're branding uniforms, customizing hats, or creating personalized gifts, a well-digitized logo ensures crisp, clean, and durable embroidery.
Understanding PES Files
A PES file is a stitch format used primarily by Brother embroidery machines. It contains instructions for the machine, such as:
Stitch types (running, satin, fill)
Thread colors
Stitch direction and density
Sequencing for multi-color designs
Since different embroidery machines use different file formats (like DST for Tajima, EXP for Melco, or JEF for Janome), converting your design into the correct format is crucial.
How to Digitize a Logo for Embroidery
Step 1: Choose the Right Logo
Not all logos are suitable for embroidery. Ideal designs have:
Clear, bold lines
Limited fine details
Minimal gradients or shadows
A balanced color palette
If your logo is too complex, consider simplifying it before digitizing.
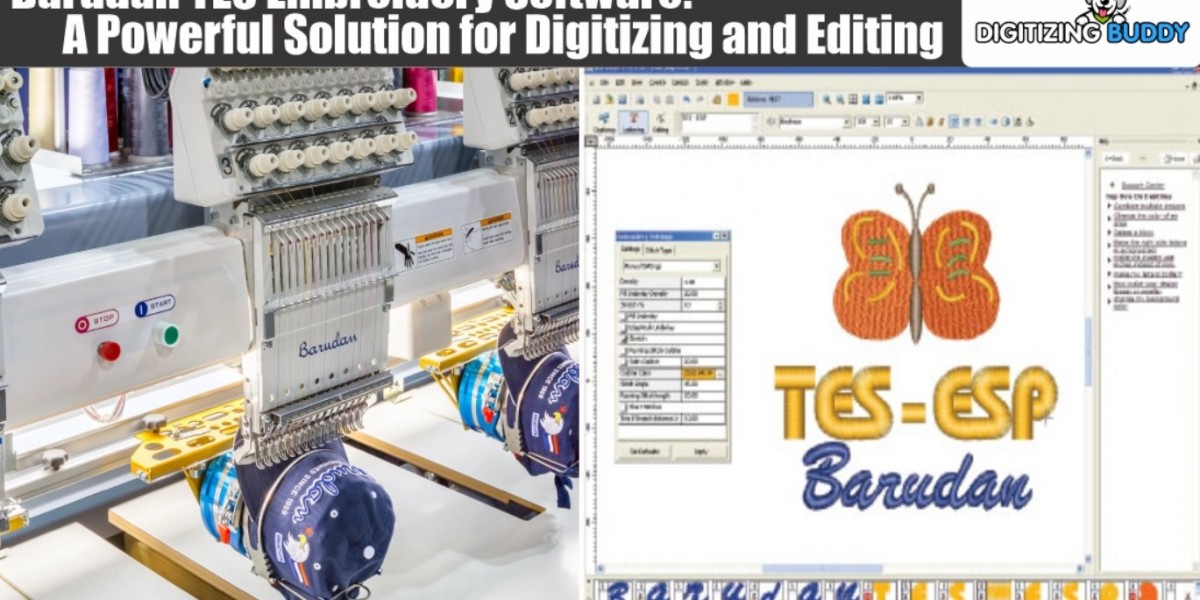
Step 2: Use Embroidery Digitizing Software
To convert a logo into an embroidery file, you’ll need specialized software. Some popular options include:
Wilcom EmbroideryStudio (Professional-grade)
Hatch Embroidery (User-friendly)
SewArt (Auto-digitizing)
Ink/Stitch (Free, open-source)
Step 3: Import and Trace the Logo
Open your digitizing software and import the logo (PNG, JPG, SVG).
Use the auto-trace tool or manually trace the design to create stitch paths.
Adjust stitch types:
Satin Stitch for outlines and text
Fill Stitch for larger solid areas
Running Stitch for fine details
Step 4: Adjust Stitch Settings
Density: Too many stitches can make the design stiff; too few may look patchy.
Underlay: Adds stability to prevent fabric puckering.
Pull Compensation: Adjusts for fabric tension during stitching.
Step 5: Save as a PES File
Once your design is ready, export it as a PES file (or another machine-compatible format).
How to Convert an Image to a PES File
If you don’t have digitizing software, you can use online converters or outsourcing services:
Option 1: Online PES File Converters
Websites like:
Embird Online
Stitchize
SewWhat-Pro
allow you to upload an image and convert it into a PES file. However, auto-digitized designs may require manual tweaking for best results.
Option 2: Hire a Professional Digitizer
For complex logos, hiring a digitizing service ensures high-quality results. Platforms like:
Fiverr
Upwork
Etsy
offer affordable digitizing services with quick turnaround times.
Option 3: Free & Open-Source Tools
Ink/Stitch (Inkscape extension)
My Editor (Brother’s free software)
These tools require some learning but are cost-effective for hobbyists.
Tips for High-Quality Embroidery Digitizing
Simplify Small Text: Letters under 0.3 inches may not stitch clearly.
Avoid Too Many Colors: Each color change adds time and complexity.
Test on Scrap Fabric: Run a sample to check for errors before final stitching.
Use Vector Files (SVG/AI): They provide cleaner edges than raster images (JPG/PNG).
Common Challenges in Logo Digitizing
Complex Gradients: Convert them into solid color blocks.
Thin Lines: Expand them to at least 1mm for visibility.
Overlapping Stitches: Ensure proper layering to avoid thread breaks.
Best Practices for PES File Conversion
Check Machine Compatibility: Some older machines may not support newer PES versions.
Optimize File Size: Large files can slow down stitching.
Backup Original Files: Keep editable versions in case adjustments are needed.
Conclusion
Digitizing a logo for embroidery and converting it into a PES file requires the right tools and techniques. Whether you use professional software, online converters, or hire a digitizer, a well-optimized design ensures high-quality embroidery. By following best practices and testing your files, you can achieve professional results for custom apparel, branding, and promotional products.
Need Help Digitizing Your Logo?
If you're looking for a reliable PES file converter or embroidery digitizing service, consider professional options for the best outcome. Start with a simple design, experiment with settings, and soon you’ll master the art of embroidery digitization!